Paper Samples of all 4 new paper packs Clockwise from left
Twitterpated
Grace
Jingle
Sweet Home
$15.95 for 2 ea. of 6 patterns, 10 sheets cardstock
 Creative Basics: Jingle 6 ea. of 2 designs (12 x 12) plus 4 yards Juniper Grosgrain Ribbon $9.95
These are made to make cards but can also to be used with Jingle paper pack. Backs are same pattern put monochromatic, Juniper and Tulip. So you really get 4 different papers.
These were hard to photograph! The cream frame on the photo is my favorite. Several of the transparencies nest. Attach with vellum glue or our Liquid Glass. Make sure to take off the clear protective backing before attaching. Makes a HUGE difference.
These can be used as borders or cut to use smaller portions. Designs include: stars, zig zag stitch, straight stitch, cross stitch, single line dots, wishing you the best, thank you, line alpha, filled numbers, flowers, swirls, 3 line dots, days of the week, months, ruler.
Several large to medium snowflakes. These look gorgeous covered in Prisma Glitter!
 Twinkle Brads 24 Brads: 3 Big brads and 3 standard brads for 3 colors: Hollyhock, Olive, Tulip $4.95
These are glitter covered brads. Made to coordinate with Jingle but could be used will any paper pack.
There is so much more. 75+ stamps sets, 2 new ribbon sets (Buttercup, Cranberry), Basic colored buttons, Pewter mini embellies, Bookplate and large Circle chipboard, Cocoa embossing powder, Snapease album system (makes it so your post bound album can be added to in seconds!), Soft set Eyelet Tool (no more banging!), soft set eyelets in basic colors, and a new shoulder tote and Rolling Carryall.
 Twinkle Brads 24 Brads: 3 Big brads and 3 standard brads for 3 colors: Hollyhock, Olive, Tulip $4.95
These are glitter covered brads. Made to coordinate with Jingle but could be used will any paper pack.
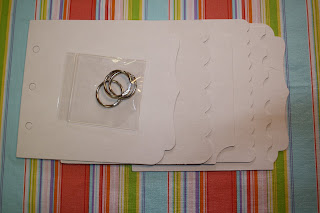
Front and Back pages are the same, 4 more pages all different. I will be using 1-2 of these plus one of our Clear Acrylic Mini Album ($18.50) for my December daily mini album.
There is so much more. 75+ stamps sets, 2 new ribbon sets (Buttercup, Cranberry), Basic colored buttons, Pewter mini embellies, Bookplate and large Circle chipboard, Cocoa embossing powder, Snapease album system (makes it so your post bound album can be added to in seconds!), Soft set Eyelet Tool (no more banging!), soft set eyelets in basic colors, and a new shoulder tote and Rolling Carryall.
I will be placing an order on Sept. 20.


